

Gingerbread House: Traditional Recipe for a Magical Christmas | Bona Sanitas
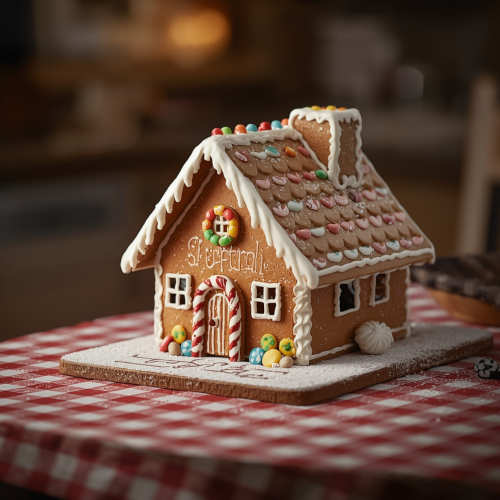
Gingerbread House: Traditional Recipe for a Magical Christmas
There is a particular kind of kitchen magic that happens when gingerbread is baking — the warm, spiced fragrance of cinnamon, ginger, and molasses fills every room and announces, more convincingly than any calendar, that the holiday season has truly arrived. Building a gingerbread house takes that magic and extends it into an afternoon or evening of creativity, laughter, and shared effort that becomes, with repetition, one of the most cherished family rituals of the year.
This recipe and guide covers everything you need to know: the history behind this centuries-old tradition, a detailed ingredient list, step-by-step preparation and assembly instructions across six phases, professional tips for structural success, ideas for involving children of all ages, decoration inspiration, storage guidance, and creative variations. Whether you are building your first gingerbread house or perfecting a tradition that has been part of your family for years, this guide has you covered. Find more seasonal baking ideas in our healthy recipes collection.
The honest truth about gingerbread houses is that they take time — typically an afternoon for experienced bakers, longer for first-timers — and patience at key drying stages is genuinely non-negotiable. But none of the steps are difficult. The recipe is forgiving, the assembly principles are straightforward once understood, and the decorating phase is pure joy for participants of all ages. The result is an edible centerpiece that will be the star of your Christmas table and a project that everyone who contributed to it will remember long after the gingerbread itself is gone.

History and Tradition: From Medieval Europe to Your Kitchen
The story of the gingerbread house is older than most people realize, and it touches on several fascinating threads of culinary and cultural history. Gingerbread itself originated in medieval Europe, where spices like ginger, cinnamon, cloves, and nutmeg were extraordinarily expensive commodities transported along trade routes from Asia and the Middle East. Their rarity made them precious, and their use in food was associated with celebration, religious festivals, and demonstrations of wealth and hospitality.
European monks were among the earliest makers of elaborately molded gingerbread, crafting it into shapes that ranged from religious icons to architectural forms for feast days and fairs. By the sixteenth and seventeenth centuries, gingerbread fairs were a fixture of European festival culture, with elaborate shaped pieces sold as both food and decorative objects. Germany developed a particularly strong gingerbread tradition centered in the city of Nuremberg, where bakers formed guilds dedicated to the craft, and the architectural possibilities of stiff gingerbread dough were extensively explored.
The gingerbread house as we know it — a full building structure edible from roof to foundation — became culturally embedded partly through the power of a single story. When the Brothers Grimm published their collection of German folk tales in 1812, including Hansel and Gretel with its witch’s cottage built entirely of edible sweets, they gave a name and a vivid image to a concept that spread through European Christmas tradition rapidly. German emigrants brought the tradition to North America in the nineteenth century, and from there it became one of the most widely practiced Christmas baking traditions in the world.
Today, gingerbread houses represent something beyond a baking project. They are an invitation to slow down, create together, and participate in a tradition that connects us to centuries of human celebration and craftsmanship. They belong in our romantic cuisine collection as much as in any baking guide — because the experience of building one together, whoever your companions are, is genuinely intimate and joyful.
Understanding the Ingredients
Before measuring anything, it is worth understanding what each component does in this recipe. Gingerbread for construction differs from gingerbread for eating in one critical respect: it needs structural integrity. The dough must bake firm enough to support the weight of walls, roof, and decorations without cracking, while retaining enough flexibility to be cut cleanly and to resist breaking when panels are handled and assembled.
The high flour content provides the gluten network that gives structure. Molasses contributes both the characteristic dark color and a hygroscopic quality — it attracts and retains moisture — which paradoxically helps the finished pieces stay slightly pliable rather than becoming so dry they shatter. Brown sugar deepens flavor and color. The generous quantity of spices is both traditional and functional: ginger and cinnamon have mild antimicrobial properties that help the finished house resist mold, extending its decorative life. Butter provides richness and tenderness in the dough; the egg binds everything together and contributes to the chewiness of the finished pieces.
Royal icing — the structural glue that holds the house together — works because egg whites and powdered sugar, beaten to stiff peaks, dry to a remarkably hard, cement-like finish when exposed to air. The addition of cream of tartar or lemon juice helps stabilize the protein structure and produces a firmer set. This is not decoration icing; it is engineering material, and its success depends on using a perfectly clean, grease-free bowl and beating to genuinely stiff peaks.
Ingredients
For the gingerbread dough (1 medium house):
- 500g (4 cups) all-purpose flour, plus extra for dusting
- 1 teaspoon bicarbonate of soda
- 2 teaspoons ground ginger
- 2 teaspoons ground cinnamon
- 1 teaspoon ground cloves
- ½ teaspoon ground nutmeg
- ½ teaspoon fine salt
- 150g (⅔ cup) unsalted butter, at room temperature
- 200g (1 cup, packed) light or dark brown sugar
- 1 large egg, at room temperature
- 180ml (¾ cup) dark molasses or black treacle
- 1 teaspoon pure vanilla extract
For the royal icing (structural glue and decoration):
- 3 large egg whites, at room temperature (or 6 tablespoons dried egg white powder reconstituted with water)
- 500g (4 cups) icing sugar, sifted
- ½ teaspoon fresh lemon juice
- ¼ teaspoon cream of tartar (optional but recommended for extra strength)
For decoration (choose according to your vision):
- Boiled sweets (hard candies) — crushed for stained glass windows
- Mini marshmallows for chimney and snowdrift effects
- Round sweets — M&Ms, Smarties, chocolate buttons — for roof tiles
- Pretzel sticks for fencing, log piles, and path edging
- Sugar cones for pine trees
- White nonpareils or pearl sugar for snow effects
- Licorice, gummies, dragées, and sprinkles of your choice
- Desiccated coconut to simulate snow on roof and ground
- Edible glitter for a frosted effect
- Icing sugar for a final dusting of fresh snow
Equipment needed:
- Rolling pin and large flat work surface
- Parchment paper or silicone baking mats
- Cardboard or paper for house templates
- Sharp knife or pizza wheel cutter
- Baking trays (at least 2)
- Piping bags and round tips in various sizes, or strong zip-lock bags with a corner snipped
- Sturdy board, tray, or thick cardboard wrapped in foil as assembly base
- Small cans, cups, or books as temporary supports during assembly
- Small bowls or muffin tin for organizing decoration sweets
Preparation: Phase 1 – Making the Dough
Step-by-step instructions:
- Combine dry ingredients: In a large bowl, whisk together the flour, bicarbonate of soda, ginger, cinnamon, cloves, nutmeg, and salt until the spices are evenly distributed. Set aside.
- Cream butter and sugar: In a large bowl or stand mixer fitted with the paddle attachment, beat the softened butter and brown sugar together at medium speed for 3–4 minutes until the mixture is pale, light, and fluffy. Scrape down the sides of the bowl halfway through.
- Add wet ingredients: Add the egg, molasses, and vanilla extract to the butter mixture. Beat at medium speed until fully incorporated. The mixture may look slightly curdled or loose at this stage — this is normal and will correct when the flour is added.
- Incorporate flour: Add the dry ingredient mixture in three additions, mixing on low speed (or folding by hand with a sturdy spatula) until a uniform dough forms. Stop mixing as soon as no streaks of flour remain. Over-mixing develops gluten and can make the dough tough and hard to roll.
- Rest the dough: Divide the dough into two equal portions. Flatten each into a disc approximately 2cm thick, wrap tightly in cling film, and refrigerate for a minimum of 2 hours. Overnight refrigeration is ideal and produces better results. Cold dough holds its shape during rolling and baking; warm dough spreads and distorts. This step cannot be skipped.
Total time for Phase 1: 20 minutes + minimum 2 hours chilling
Preparation: Phase 2 – Templates, Rolling, and Cutting
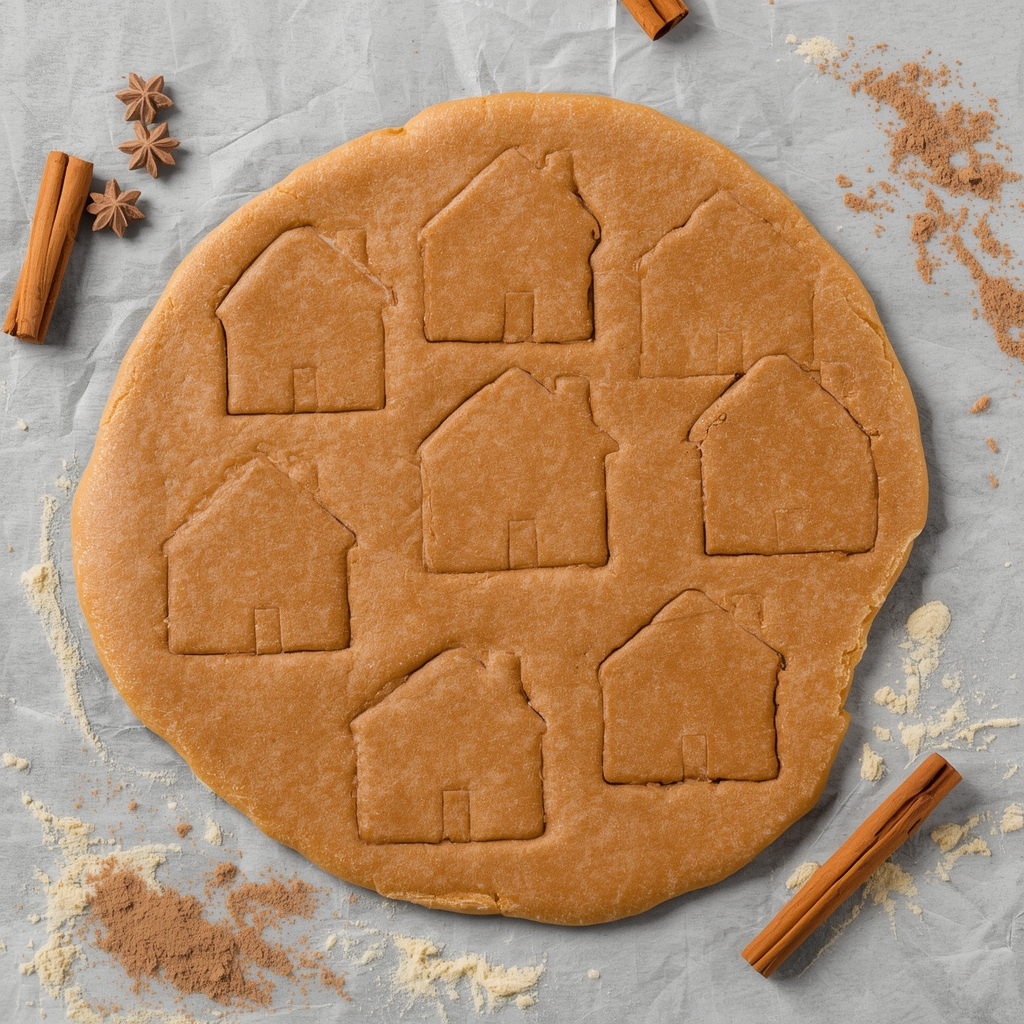
- Create templates: While the dough chills, cut your house templates from stiff cardboard or thick paper. A classic medium house requires: two front/back wall panels (15cm wide × 12cm tall with a 5cm triangular gable), two side wall panels (10cm wide × 12cm tall), and two roof panels (18cm × 11cm). Sketch and cut a door shape and window shapes within the wall templates — these cutouts will be removed before baking.
- Preheat oven: Heat the oven to 175°C (350°F / Gas Mark 4). Line two baking trays with parchment paper.
- Roll the dough: Remove one disc of dough from the refrigerator. Place it between two sheets of parchment paper and roll to a consistent thickness of approximately 5–6mm. Rolling between parchment eliminates the need for additional flour, which would toughen the dough. The thickness is important — thinner than 5mm and the pieces become fragile; thicker than 7mm and they may not bake evenly throughout.
- Cut the pieces: Place the templates on the rolled dough and cut carefully around each with a sharp knife, keeping the blade vertical for clean edges. Cut out the door and window openings at this stage. For stained glass windows, finely crush colored boiled sweets in a sealed bag and fill the window openings with the powder before baking — it will melt into translucent colored glass during baking.
- Transfer to trays: Carefully slide a thin spatula under each cut piece and transfer to the prepared baking trays, leaving approximately 3cm between pieces. If the dough has softened significantly during cutting, slide the tray of cut pieces into the freezer for 10 minutes before baking — this firms them and preserves their exact shape during baking.
Total time for Phase 2: 45–60 minutes
Preparation: Phase 3 – Baking
- Bake the pieces: Bake for 12–15 minutes for smaller pieces (side walls, door cutouts) and 15–18 minutes for larger pieces (roof panels, front and back walls). The pieces are done when the edges are set and slightly golden, and the center feels firm but gives slightly to a gentle press. They will harden further as they cool.
- Trim while hot: Immediately after removing from the oven, while the pieces are still soft and warm, lay the templates back over each piece and use a sharp knife to trim any edges that have spread during baking. This is the only window of opportunity to correct irregular edges — once the gingerbread cools and hardens, trimming will cause cracking.
- Cool completely: Slide the parchment with the baked pieces onto a wire rack and allow them to cool completely — at least 30 minutes. Handle pieces only when fully cool and firm. Pieces that seem slightly soft when warm will harden significantly as they cool. Do not attempt to move or stack warm pieces; they will break.
Total time for Phase 3: 15–20 minutes per batch
Preparation: Phase 4 – Royal Icing
- Prepare equipment: Ensure your bowl and whisk are completely clean and grease-free. Even a trace of fat — from butter, oil, or egg yolk — will prevent the egg whites from achieving the stiff peaks required. Wipe both with a paper towel dampened with a little white vinegar if in doubt.
- Begin beating: Add the egg whites to the bowl and beat at medium speed until slightly foamy — about 30 seconds. If using dried egg white powder, reconstitute it according to the packet instructions first.
- Build the icing: Add the sifted icing sugar gradually in three additions, incorporating each batch on low speed to avoid a sugar cloud. Add the lemon juice and cream of tartar. Once all sugar is incorporated, increase the speed to high and beat for 5–7 minutes until the icing forms stiff, glossy peaks. When you lift the whisk, the peak it leaves should stand completely upright without drooping.
- Adjust consistency: For structural gluing (walls and roof assembly), the icing should be thick enough to hold shape when piped. For decoration, a slightly thinner consistency works better. If the icing is too thick, add water a few drops at a time and mix briefly. If too thin, add more icing sugar a tablespoon at a time.
- Cover immediately: Transfer the icing to piping bags and close them tightly. Cover any bowl of icing with a damp cloth pressed directly onto the surface. Royal icing forms a crust within minutes when exposed to air.
Total time for Phase 4: 15 minutes
Preparation: Phase 5 – Assembly
- Prepare the base: Place your assembly board or tray on a stable, flat surface where it can remain undisturbed for several hours. If desired, spread a layer of royal icing over the entire base and use a fork or palette knife to create snow texture. Set aside to firm slightly before beginning assembly.
- First wall joint: Pipe a generous, thick line of royal icing along one vertical edge of the front wall panel. Press a side wall panel firmly against it at a right angle and hold in place for 2–3 minutes. Place cans, mugs, or books against the outside of both pieces to support them. The icing will not be fully set yet but should be tacky enough to resist movement.
- Build the structure: Add the back wall panel and the remaining side wall panel one at a time, applying icing to all connecting edges and using supports at every junction. Pipe additional icing along all interior corners and smooth it with a damp fingertip or small spatula to reinforce the joints.
- Allow first set: Let the four-wall structure dry for a minimum of 1 hour before attempting to add the roof. If time allows, two to three hours or overnight produces a far more stable structure. Patience at this stage directly determines whether the house survives the addition of the roof without collapsing.
- Add the roof: Pipe thick lines of icing along the top edges of all four walls and along the ridge peak. Apply one roof panel at a gentle angle and hold it in place — support it with your hand or a prop — for 3–5 minutes. Repeat with the second roof panel. The ridge joint is the most vulnerable point of the structure; pipe an additional generous bead of icing along it from the inside and out.
- Final structural set: Allow the fully assembled house to dry for a minimum of 2–3 hours, ideally overnight, before any decoration is added. This is the hardest waiting period to endure, but it is the step that separates a house that survives decoration from one that collapses mid-way through.
Total time for Phase 5: 1–2 hours active work + minimum 3 hours drying
Preparation: Phase 6 – Decoration
- Tile the roof: Beginning at the lower edge of one roof panel, pipe horizontal lines of icing and press round sweets — chocolate buttons, M&Ms, Smarties — into them in overlapping rows, working upward toward the ridge. Repeat on the other panel. Alternatively, spread icing thickly and irregularly across the roof for a snow-laden effect, then press desiccated coconut or white nonpareils into the wet icing.
- Frame windows and door: Use white or colored royal icing in a fine-tipped piping bag to draw window frames, shutters, and door details. A simple arch over the door, small panes divided by crosshatch lines within window openings, and a horizontal ledge effect along the base of the walls all add architectural character with minimal effort.
- Build a chimney: Assemble a small chimney from gingerbread offcuts or rectangular sweets, gluing pieces together with royal icing and attaching the assembled chimney to the roof with additional icing. A tuft of cotton wool or a swirl of stiff white icing suggests smoke rising.
- Create icicles: Along the lower edges of the roof, press the tip of a piping bag against the surface and draw downward in a slow, continuous movement to create hanging icicle shapes. Varying the length and angle creates a more natural result than uniform drops.
- Design the landscape: Arrange the base around the house to tell a complete winter scene. A path of square sweets leading to the front door, a pretzel-stick fence along the sides, inverted sugar cones glued upright for pine trees and dusted with white icing for snow, and small gingerbread people or animals positioned around the house all contribute to a scene that has charm and coherence.
- Final snow: Once all decorations are in place and firmly set, dust the entire house and base generously with sifted icing sugar through a fine sieve. This single finishing step has a transformative effect, unifying all the elements and creating a convincingly winter scene. Scatter a little edible glitter over the wet icing sugar for a frosted sparkle effect.
Total time for Phase 6: unlimited — this is the most joyful phase and should not be rushed
Professional Tips for a House That Stays Standing
Never skip the dough resting period. This is not optional. Cold dough holds its shape during rolling and cutting and bakes with crisper, more defined edges. Warm dough spreads and you will lose the precise dimensions needed for tight-fitting assembly joints.
Roll to consistent thickness. Uneven thickness produces panels that bake at different rates — the thin areas overbake and become fragile while thick areas may remain slightly underdone. Use rolling pin guides (rubber bands, dowels, or purpose-made thickness guides) if you find it difficult to roll evenly by hand.
Use generous quantities of royal icing at joints. The temptation is to be neat and minimal, but structural joints — the corners where walls meet and the entire roof line — need thick, generous beads of icing to achieve genuine strength. Excess icing can be smoothed or covered with decoration; a joint with too little icing will fail.
Respect every drying stage. The sequence of waits — after dough chilling, after wall assembly, after adding the roof — cannot be compressed without risk. Royal icing that appears set on the surface may still be soft inside. If the house falls during assembly, the cause is almost always insufficient drying time at a previous stage.
Repair without panic. If a panel cracks or a wall collapses, the solution is always more royal icing. Press the pieces together, hold them for several minutes, let them set, and cover the repaired area with a decoration. Most breaks are completely invisible in the finished house.
Involving Children at Every Age
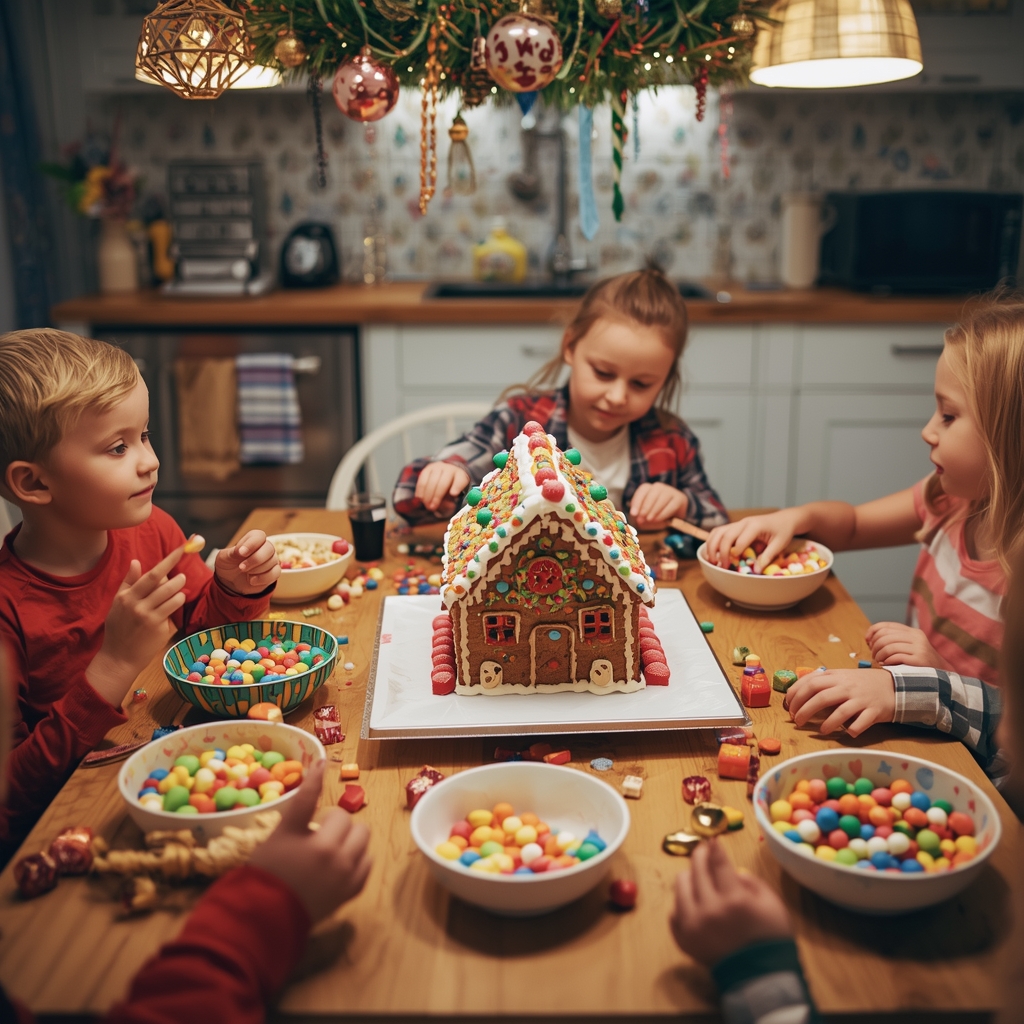
A gingerbread house project is genuinely inclusive when planned with the abilities of your youngest participants in mind. Children ages three to six can contribute meaningfully to the decoration phase without any safety concerns: sorting sweets by color, pressing candies into soft royal icing under supervision, sprinkling sugar snow, and choosing where landscape elements should go. Their contributions are authentic and their pride in the finished house is real and infectious.
Children ages seven to twelve can take on progressively more technical tasks: rolling dough with guidance, cutting shapes with cookie cutters from the scraps, helping to hold wall panels during assembly, applying royal icing for landscape elements, and designing and executing specific sections of the decoration. Give each child ownership of one element of the design — one wall, the chimney, the entire base landscape — and their investment in the final result will be complete.
For all ages, protect the work surface with a plastic tablecloth, have aprons ready, and keep wet cloths nearby for sticky hands. Make it clear from the start that eaten sweets are part of the project budget — fighting over candy while trying to maintain structural integrity is a recipe for chaos. Set aside a bowl of extra sweets specifically for eating, separate from the decoration supplies.
Storage, Display, and Longevity
A well-built and fully dried gingerbread house is a remarkably durable object. Kept in a cool, dry environment away from direct sunlight and moisture, it can remain structurally intact and visually beautiful for several weeks. The enemy of gingerbread houses is humidity — moisture softens the royal icing and allows the gingerbread itself to absorb water and become soft. Do not refrigerate a decorated gingerbread house; the moisture inside a refrigerator will rapidly degrade both the icing and the biscuit. Do not store near steam-producing appliances.
For display, a gingerbread house makes an extraordinary Christmas table centerpiece and a genuinely special focal point on a sideboard, mantelpiece, or entryway table. Placing battery-operated LED fairy lights inside the house through the door or an open window before assembly creates a magical warm glow in the finished structure when the room lights are lowered. The effect when children see it glowing for the first time is unforgettable. For more ideas on creating memorable, beautiful Christmas occasions, visit our healthy recipes collection and browse our full recipe archive for the season.
Creative Variations and Dietary Adaptations
The basic template of this recipe adapts to a remarkable range of interpretations. Thematically, a mountain chalet with pretzel-log walls and a heavy snow-laden roof has a rustic, Alpine charm. A Victorian house with elaborate piped architectural details and pastel-colored candies is elegant and nostalgic. A complete village — three or four small houses of different designs on a single large base — is spectacular and manageable if the work is shared across multiple decorators. An igloo built from stacked half-sphere shapes covered entirely in white royal icing and white chocolate chips is particularly striking and requires no template-cutting at all.
For a gluten-free version, substitute a quality 1:1 gluten-free flour blend for the all-purpose flour. The dough may be slightly more delicate to handle but produces excellent results. For a dairy-free or vegan version, replace the butter with plant-based butter (coconut oil-based varieties work particularly well), substitute the egg with 1 tablespoon of ground flaxseed mixed with 3 tablespoons of water and rested for five minutes, and use aquafaba (the liquid from a can of chickpeas, beaten to soft peaks) in place of egg whites for the royal icing. Vegan royal icing sets slightly less hard than the egg-white version but is entirely functional for both assembly and decoration.
You can read Tales from the archives: « The Gingerbread Man » (Mayo Clinic).